Netgear SmartSwitch GS752TP | GS728TP/v2 | GS728TPP/v2 | GS752TPv2 | GS752TPP
This documentation will work for all of the Netgear switches mentioned in the title.
GS728TP — 28-Port Gigabit Ethernet Smart Switch with 4 SFP Ports (16 PoE, 8 PoE+) (192W)
Documentation
Software Administration Manual
Firmware and Software Downloads
NETGEAR Switch Discovery Tool for Linux Version 1.2.103 - File size: 69.7 MB Download
NETGEAR Switch Discovery Tool for Windows Version 1.2.103 - File size: 41 MB Download
NETGEAR Switch Discovery Tool for Mac Version 1.2.103 - File size: 65.4 MB Download
Smart Control Center v1.1.3.4 - File size: 19.7 MB Download
Enable SSH
- Enable Telnet
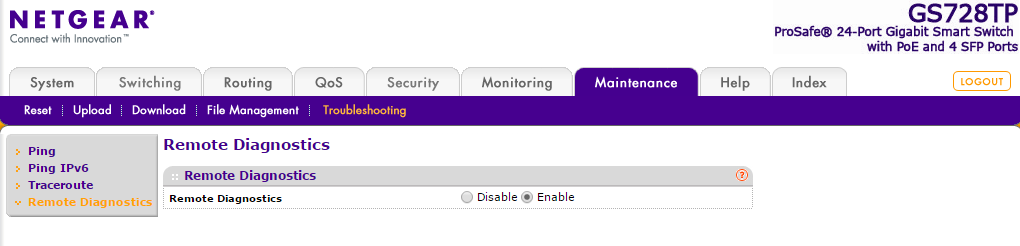
In the manual, Netgear mentions that you can enable telnet “for diagnostic purposes.” To do this, go to Maintenance > Troubleshooting > Remote Diagnostics. - Login
Once you have telnet enabled, connect to it using your favorite telnet client. (Putty works great on Windows). The password is whatever you use to login to the web interface.
Username: admin
Password:(default: password) - Enter Configuration Mode
Once you are logged in, you will be at a command prompt with the name of your switch followed by#symbol.
Typeconfigto enter configuration mode. - Enable SSH
Typeip ssh serverto enable ssh access. When you press enter, it will save the configuration immediately, and you will see something like
27-Jan-2016 16:16:41 %COPY-N-LOGGINGFILECOPYSTOP: stop log messages related to file copy operations
27-Jan-2016 16:16:43 %COPY-N-LOGGINGFILECOPY: start log messages related to file copy operations
Wait for this to finish before issuing another command. - Enable Password Auth
Next, enable password authentication by typingip ssh password-auth. Again, you will see messages while it saves the configuration. - Change SSH Port (optional)
You can optionally change the SSH port by typingip ssh port <port number>. - Change SSH Timeout
You can view and change the SSH timeout (as well as other options) from the command line. Enterconfigmode and then typeline ssh. The prompt will now show(config-line)#. Typedo show line sshto view the current configuration, and you’ll see that by default the SSH timeout is 10 minutes. You can increase it to 60 minutes withexec-timeout 60.
Convert OpenSSH Public Key to SSH2 Format
ssh-keygen -e -f id_rsa.pub > id_rsa_ssh2.pub
Import SSH Public Key of another host
- SSH to Netgear Switch
- Enter into Config mode
config - Enter into config-pubkey-chain mode:
crypto key pubkey-chain ssh -
Configure new ssh client with username on switch side; type of pubkey import (rsa dsa): user-key admin rsa - Now you should be in config-pubkey-key mode to import your Pub SSH key:
key-string - Now your cursor should be in new line to paste in your SSH2 format key, once done then hit ENTER twice to save it in running-config
- You’ll be presented with
Fingerprint: 23:2b:5d:5a:8e:80:b0:11:dd:92 - Then enter exit out of entire config mode:
end - To Save the config in startup-config:
w then press Y